星期三, 8月 02, 2017

BLE Lego Train

I've been busy with BLE Lego Train recently. 
8879 Remote control IR Speed Remote Control

Traditionally, we use 8879 Remote control IR Speed Remote Control to control most 4 trains.
But I also want to control auto switch tracks with motor , it's need more and more 8884 REMOTE CONTROL IR RECEIVER.


If I want control 4 train and 4 switch, I need 2 x Remote Control, 8 x IR Receiver, 4 x 88002 Train Motor, 4 x 8883 Medium Motor, 8 x Battery Box, cost $$$$$$$$$$....

The expenditure of motor is unavoid, but I want build more intelligent railway system, a IoT based system, IR is not a good choice.
A BLE based Remote Control is better.
At beginning, I use RFDuino, a Arduino ecology mcu with NRF51822, including Nordic privated Gazell Link Layer protocol(GZll), very easy to exchange data between BLE devices by GZll.
gzll_fig1_star_network.png
GZLL Star Network


This my first prototype:


RFDuino with GZll is good, but only support 8 devices (with host, totally 9 devices), there is not enough expansion capability for me. So I begin to study next prototype.

I found RedBear BLE Nano is a good candidate, acceptable price, and a most important: open source!
RedBear BLE Nano


Open source that mean I can duplicate many BLE Nano compatible device with cheap NRF51822 board.
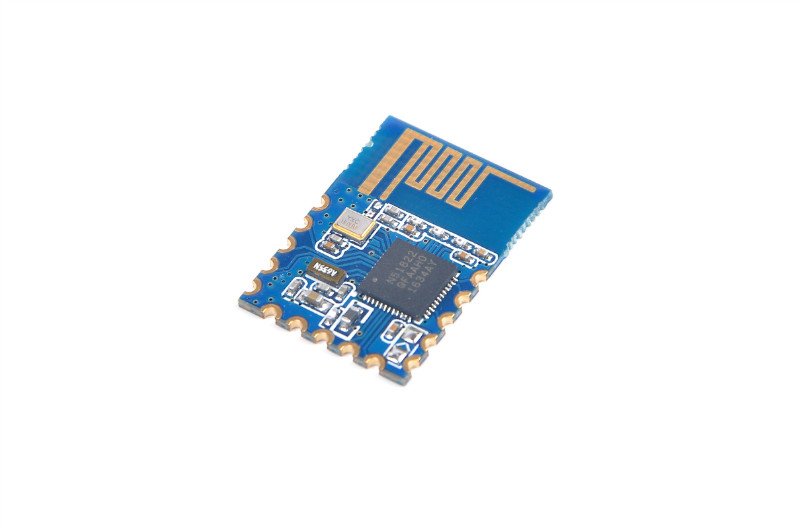
NRF51822 BLE GT82C01


First I buy a set of RedBear BLE Nano for my 2nd prototype, I use RFDuino as RC host, to treat as a Beacon/Broadcaster. BLE Nano as RC device, to treat as a observer.
BLE Nano can receive advertisement data from Beacon, parse the data and interpreter command to control motor.
Now the path between RFduino and BLE Nano is linked, next step is controlling train motor directly!

星期一, 6月 05, 2017

3.3v / 5v CanBus and TI HVD256

近來我的CanBus Project從Arduino ProMini平台轉移到Teensy 3.2平台, 因為Teensy3.2內建了CanBus Controller, 所以只要再外加一顆CanBus Transceiver( SN65HVD232 )就可以對CanBus做溝通. 且整體CanBus-ready的平台可以做得更小, 節省體積. 沒想到...這才是惡夢的開始...

我有兩套驗證CanBus用的Microchip MCP2551+2515, 接在一起:
Arduino-MCP2515-MCP2551 <---> CanBus <--->  MCP2551-MCP2515-Arduino

用Teensy替代掉其中一套, 也就是變成這樣的架構:
Arduino-MCP2515-MCP2551 <---> CanBus <--->  SN65HVD232-Teensy3.2 

用來測試CanBus的正確性, 沒想到怎麼搞兩邊就是無法溝通. 讓我極度懷疑CanBus一邊3.3v一邊5v是不可行的, 但後來爬到這文章:
http://www.ti.com/lit/an/slla337/slla337.pdf

TI指出3.3v與5v CanBus是可以共存的, 卻讓我陷入了死胡同...
當然,最常遇到的終端電阻問題, 經過測試也排除掉了.

後來換把MCP2551替換成SN65HVD232, 讓CanBus直接走3.3V:
Arduino-MCP2515-SN65HVD232 <---> CanBus <--->  SN65HVD232-Teensy3.2

還是失敗, MCP2515跟SN65HVD232間因為電壓不同, 似乎溝通上也有問題(個人推論, 並未驗證).
網路上爬文, 似乎也有不少人遇到跟我相同的問題:

https://e2e.ti.com/support/interface/industrial_interface/f/142/t/170788
https://www.amobbs.com/thread-3448321-1-1.html
http://www.microchip.com/forums/m851300.aspx
http://forum.arduino.cc/index.php?topic=173216.0

有人說是供電問題, 有人說是軟體問題, 但Teensy最終是要接車上的CanBus, 而非MCP2515/2551, 所以我也不想去處理MCP2515跟SN65HVD232間的問題.
不過就算把Teensy + SN65HVD232 接到車上CanBus也是無法溝通, 車上CanBus應該是走5V, 或許依舊是電壓造成的問題. 有一段時間就擱置下Teensy這個平台的使用計畫... 

擱置將近一年後, 我臨時興起做了個實驗, 在底下的這架構, 把CanBus BitRate從500K降到20K, 居然通了!!
Arduino-MCP2515-MCP2551 <---> CanBus <--->  SN65HVD232-Teensy3.2

但是再高一點就會一直傳錯, 開始懷疑是線材的問題(我是隨便拿兩條杜邦線來當CanBus High/Low). 但我不想處理線材問題, 會牽扯到我不太熟悉的類比領域, 有點超出side project的意義了. 所以我試著去找有沒有3.3v MCU(Teensy 3.2)可以用的5V CanBus Tranceiver??

很幸運的TI的CAN Reference Guide讓我找到一個方向:

HVD256正是我想要的解答, 它基本上是以5V運作(所以CanBus也是走5V), 但RX的部分可以相容3.3V的MCU(內建Level shifter), 所以接上3.3V Teensy是沒問題的. 這是一顆比較新的IC, 國內露天基本上是找不到現貨, 看來只能淘寶了... 但很幸運的是, TI非常佛心可以提供少量Sample, 而且還是Fedex寄出, 拿到這顆HVD256後替換HVD232, 居然通了!!!
http://www.ti.com/product/SN65HVD256/samplebuy

只是我在想, TI這顆HVD256不就直接打臉自己? 3.3V跟5V CanBus在某些條件下是無法相容??? 這個疑惑就留給有心人來解析了.... 臣,告退......

拉哩拉雜打了這麼多, 其實只有一個重點:
若你遇到3.3V跟5V CanBus無法溝通的問題, 試試看先讓它們電壓一樣吧!

Mr.Color飛機模型用Color 與 水性AQUEOUS HobbyColor 對照表

          最近跟兒子一起研究長谷川的飛機模型, 其中說明書中採用的模型漆色號以Mr.Color硝基漆為主, 水性漆AQUEOUS 為輔. 很多Mr.Color有的顏色, AQUEOUS 都沒有, 前100的色號大致上都有對應到, 但Mr.Color 300號以後的都是特...